[Tutorial] Grid Placement & Glitching it into position
Jan 21, 2016 18:28:01 GMT
Sugar_Free_Nos, Mid1010, and 10 more like this
Post by bladecruiser on Jan 21, 2016 18:28:01 GMT
So, I've seen comments and talked with people about fitting starting grids into odd places or even getting them to accept different sized vehicles. I know a few tricks to help with these things, so I thought I would share them with the rest of the crew in the hopes that it helps someone create the track that they really want to show off to others. Creativity is what this crew is really about, in both making tracks and racing on them with our own racing rules, so hopefully this helps.
Example One - Large grid in a Small Grid space
This is helpful for "fun" tracks especially, but can also be used to open up the class options for otherwise super tight tracks and allow a starting grid to be placed where it would otherwise not fit thanks to a random building or sign post blocking a spot or other inconvienently positioned things on the map.
Step 1 - Highlight grid size and choose "Small Grid".
Step 2 - Position the grid where you want it to be placed within the world.
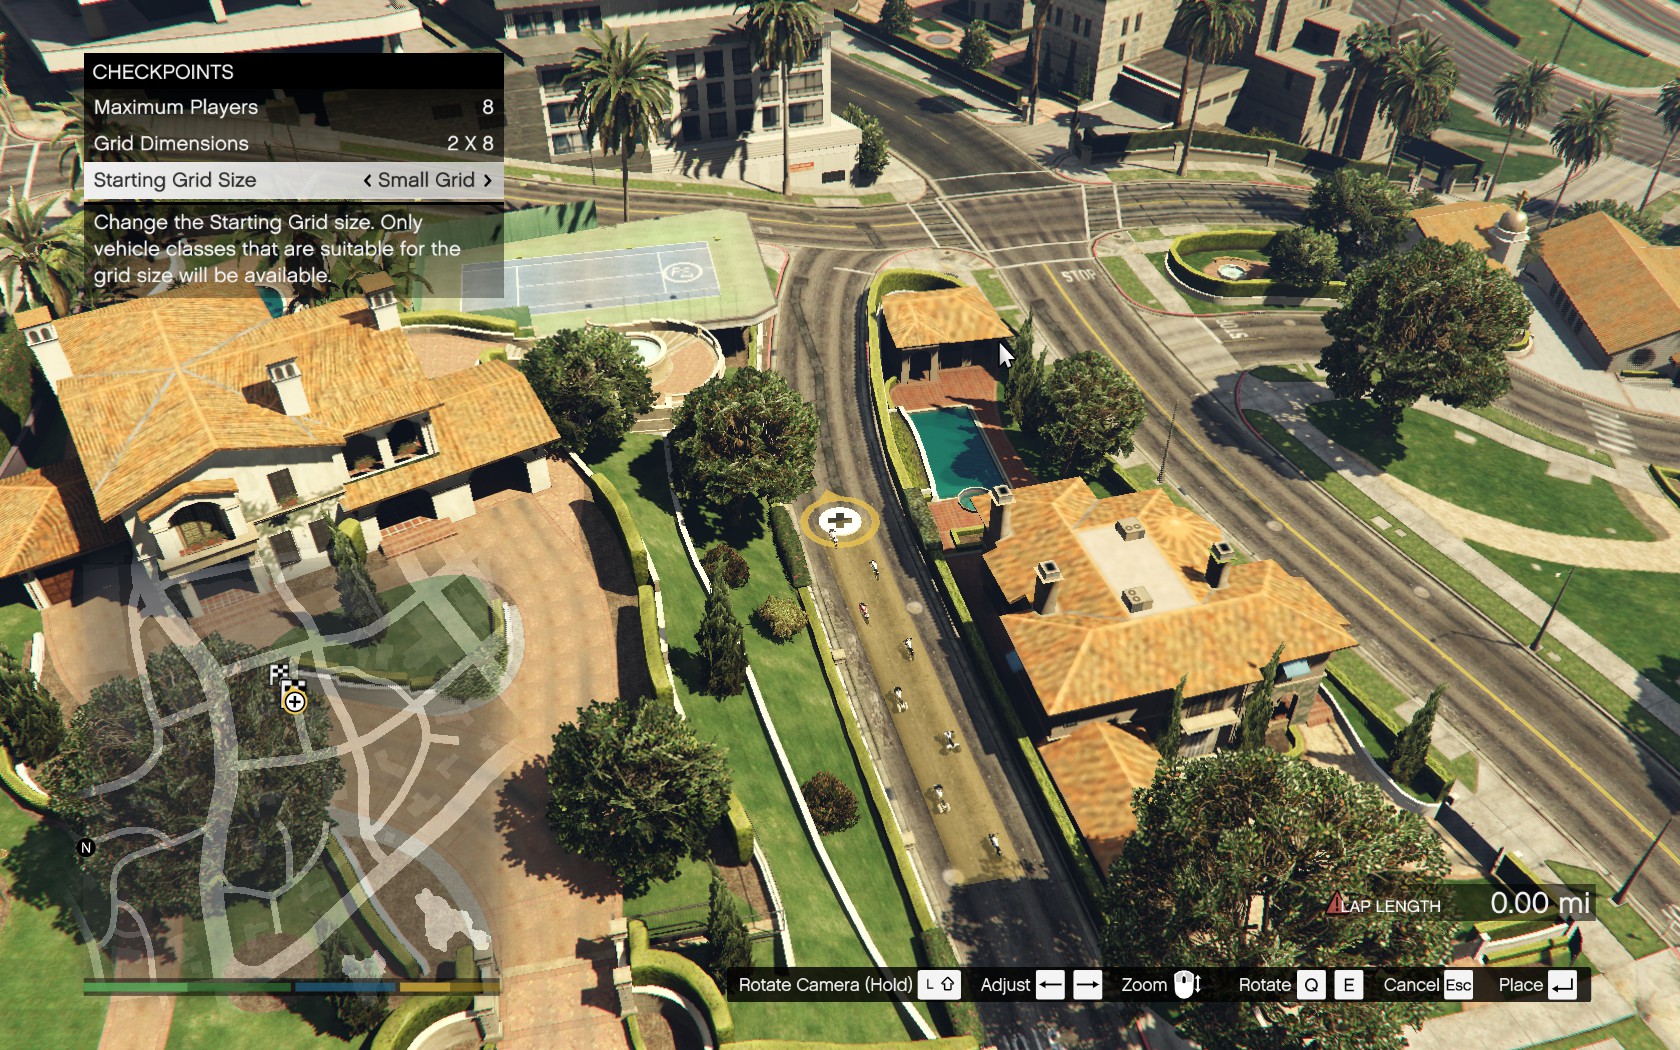
Step 3 - As you press the button to place the grid, still with Grid Size highlighted, press LEFT to swap the grid size from Small to Large.
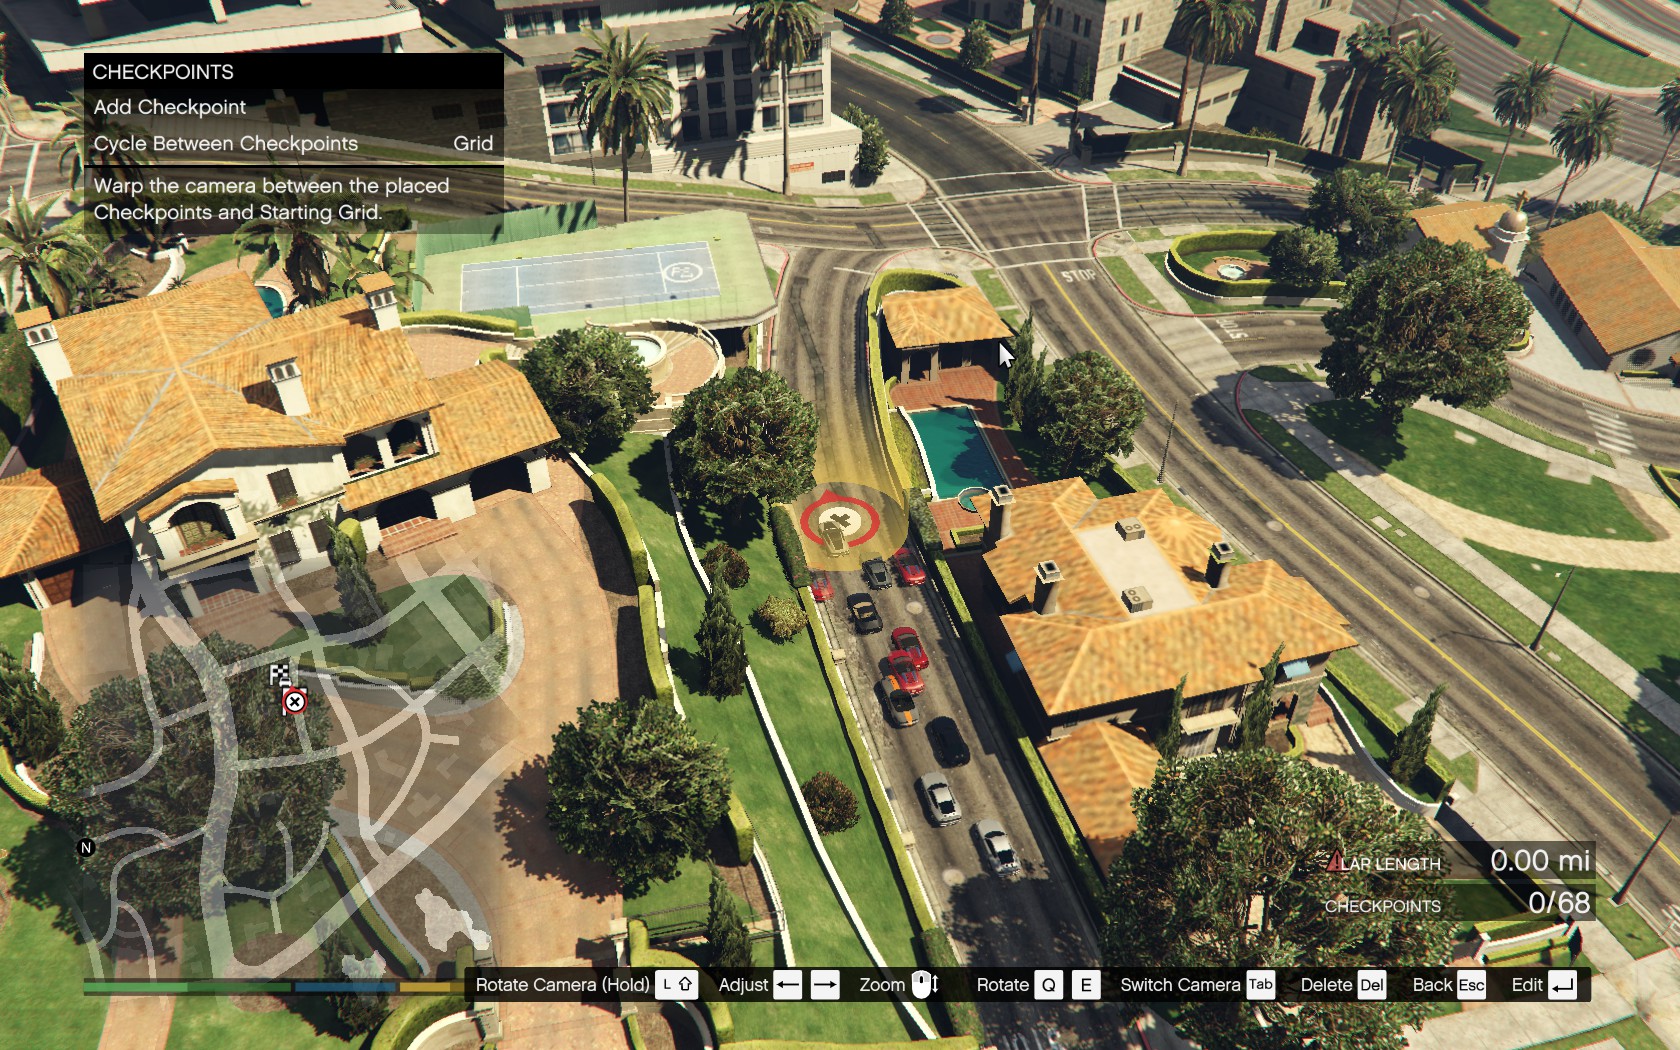
If you pressed LEFT at the same time as you placed the grid, it should show medium grid sized cars in a small grid formation. Go into Race Details and check Available Vehicles, looking to see if VANS are listed as available. If they are, congrats, you did the glitch correctly and now can use any of the classes in your race.

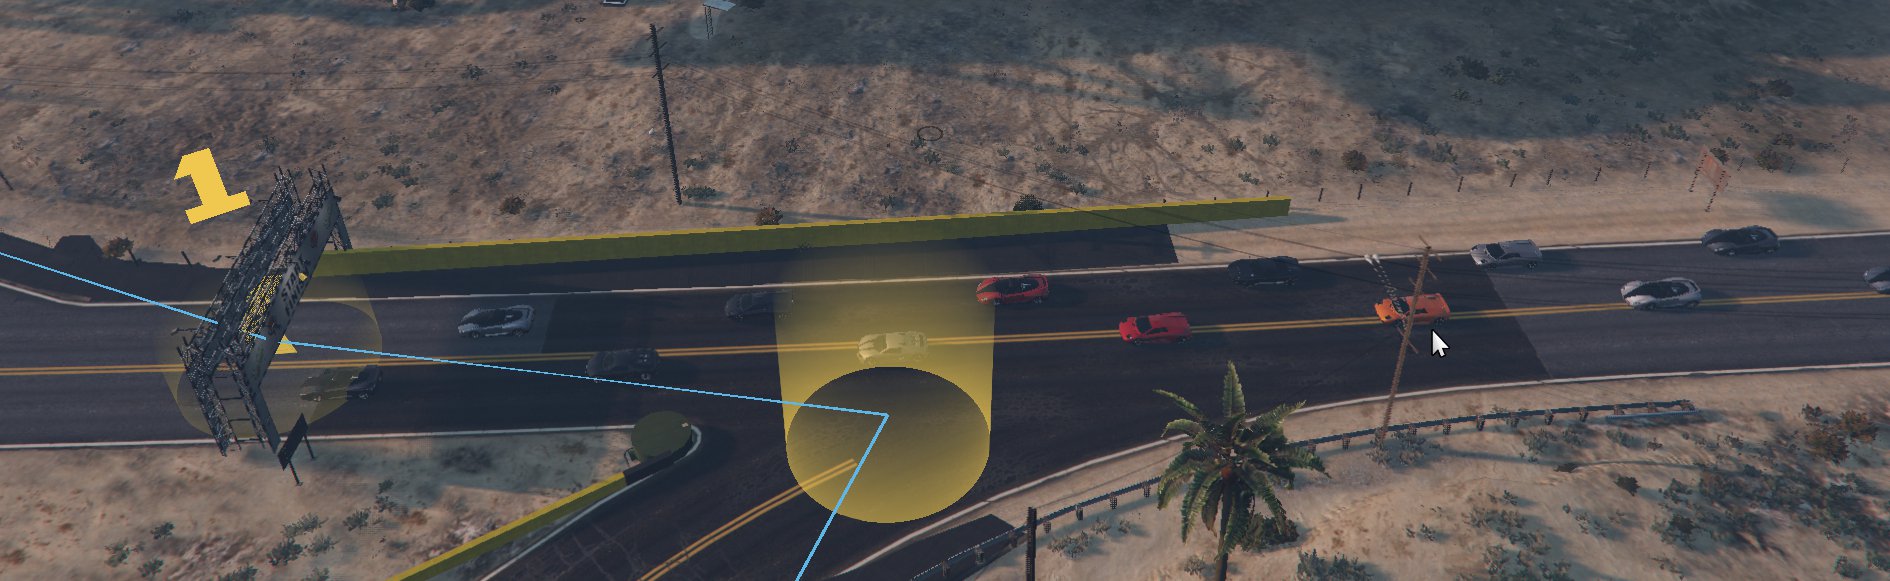
Example 2 - Fitting a grid on a road that is elevated oddly and won't let you place a grid normally
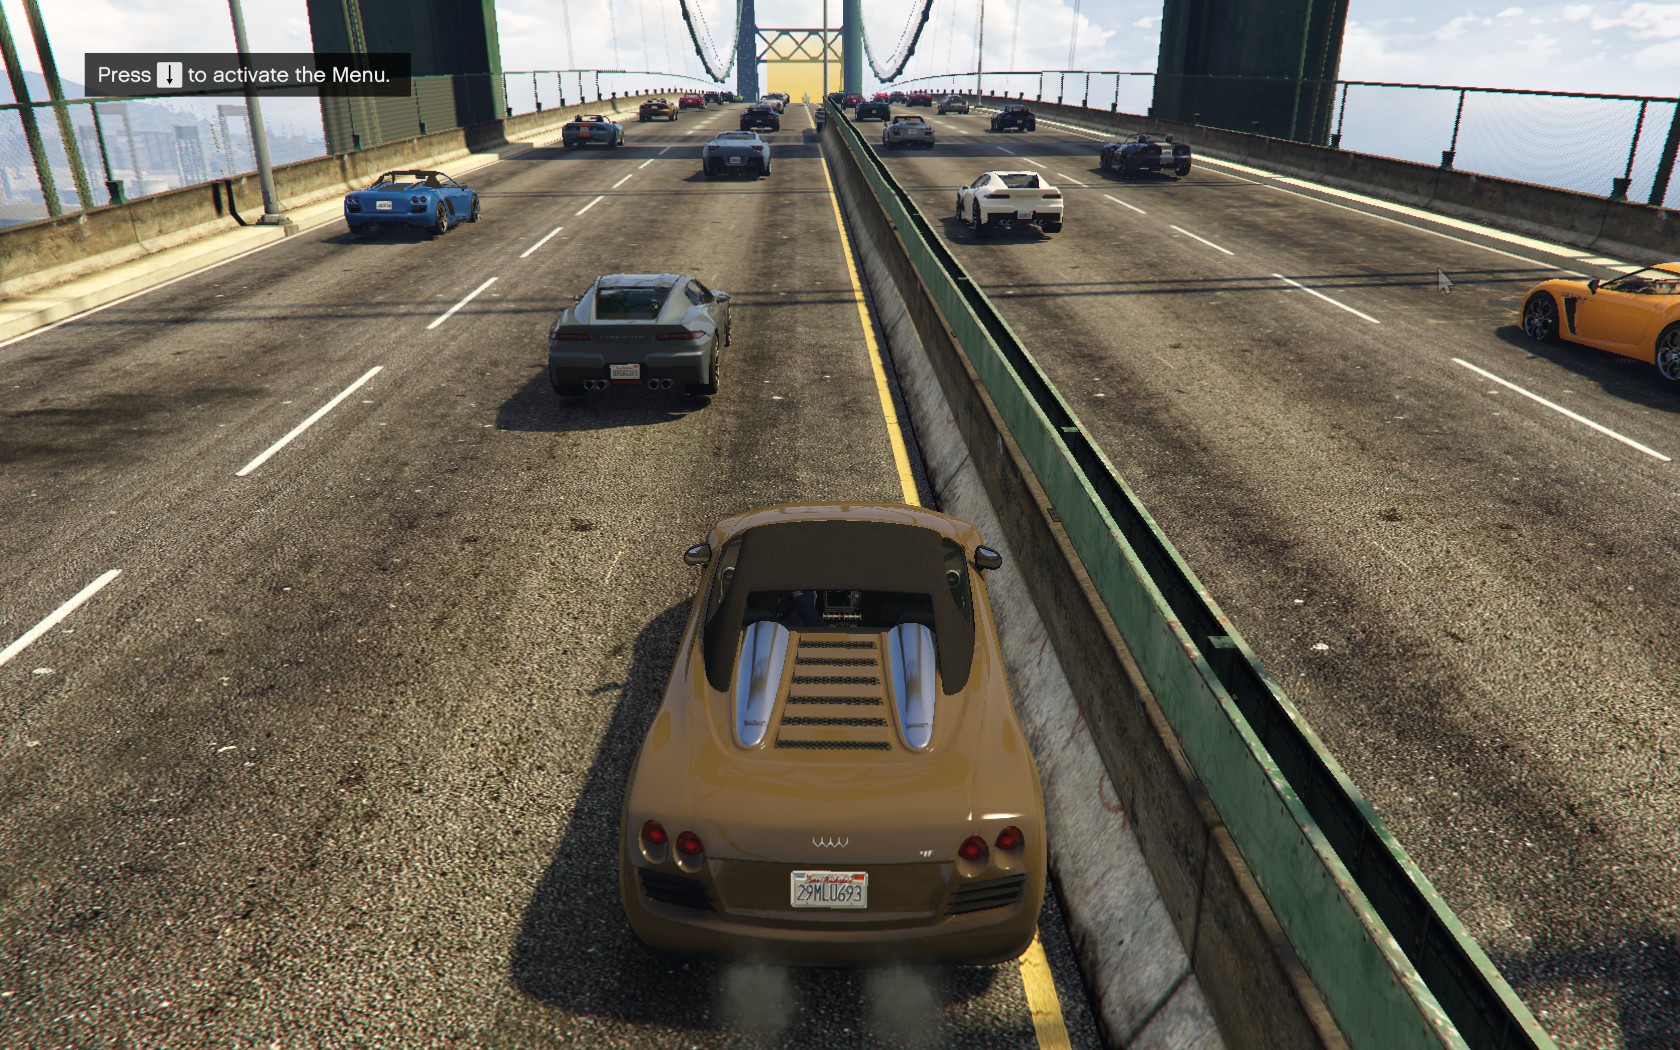
Step 1 - Line up your grid visually, making sure that the cars aren't going to be placed inside of a wall or something crazy like that. This may take some time, so a little patience here can pay off in a great grid position. Use the grid size that you want to end up to help line things up. Seen here, I am splitting my starting grid down the sides of the free way, making sure to keep the divider positioned equally between each side's cars so they don't spawn in the middle of a barrier.
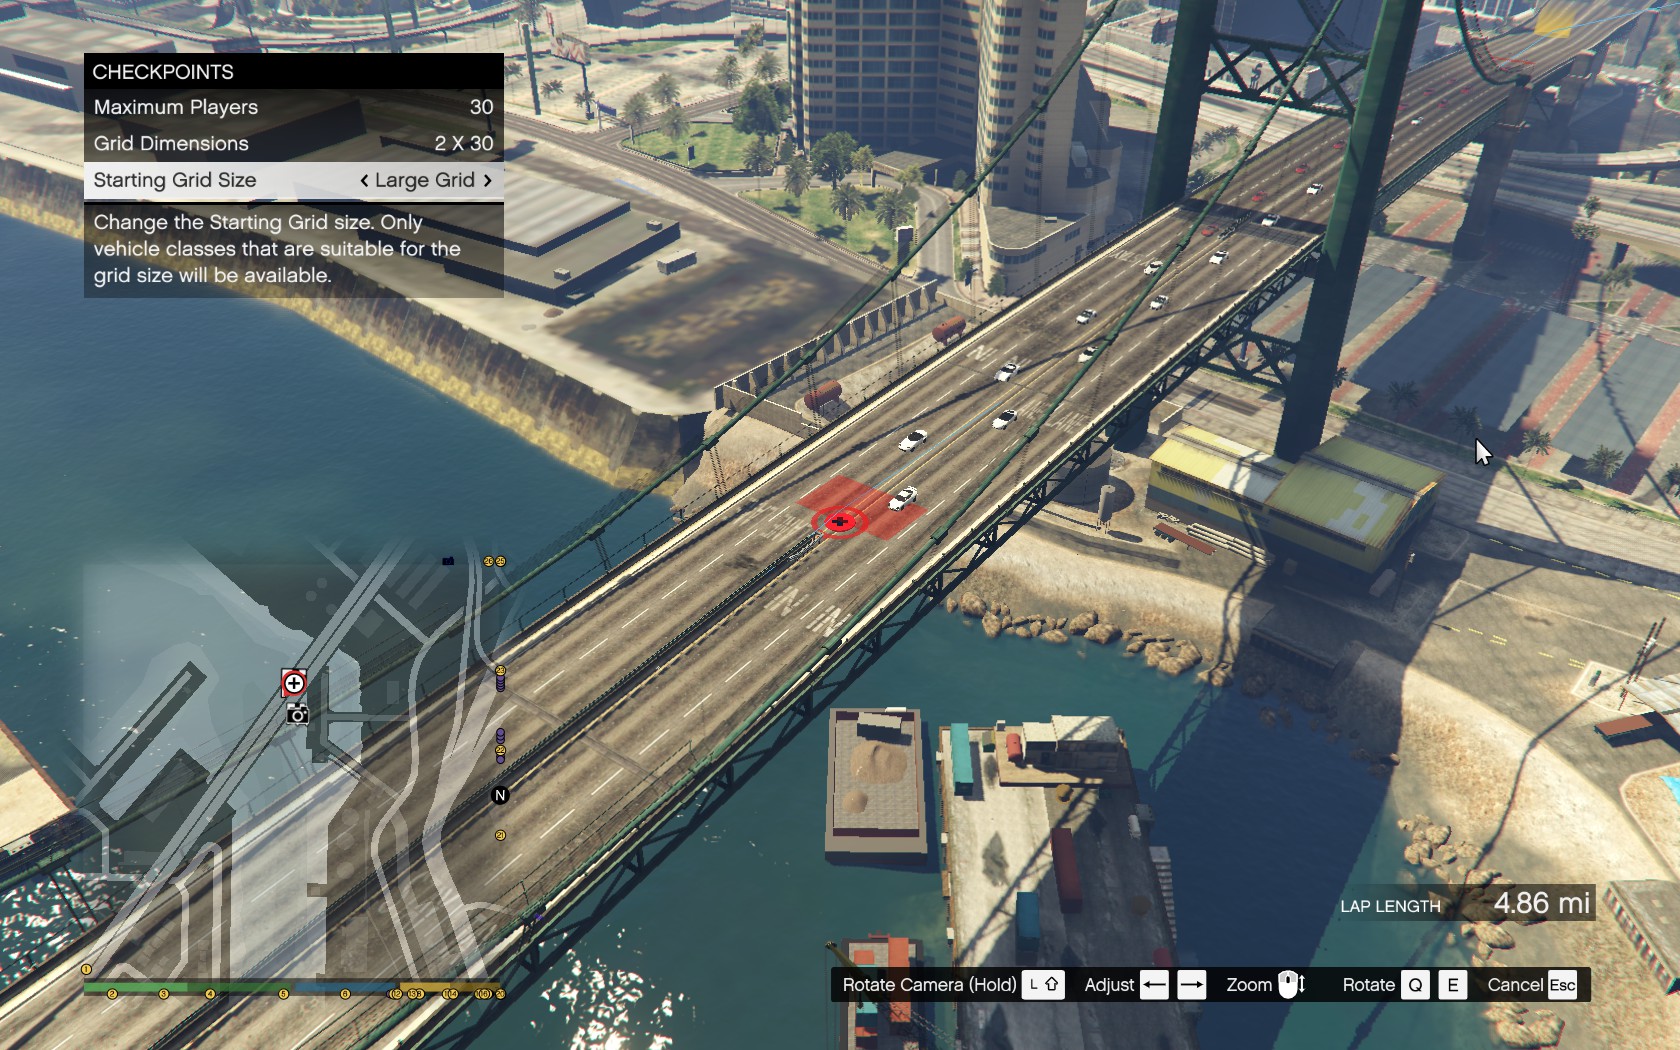
Step 2 - Once you're lined up, DON'T MOVE THE CAMERA. You don't want to mess up your position.
Step 3 - Decide which grid dimensions you want for your finished grid - 2x30, 3x20, 4x15, 5x12. You are somewhat limited here, with the choices listed as the only options for the final grid. I've decided on 4x15.
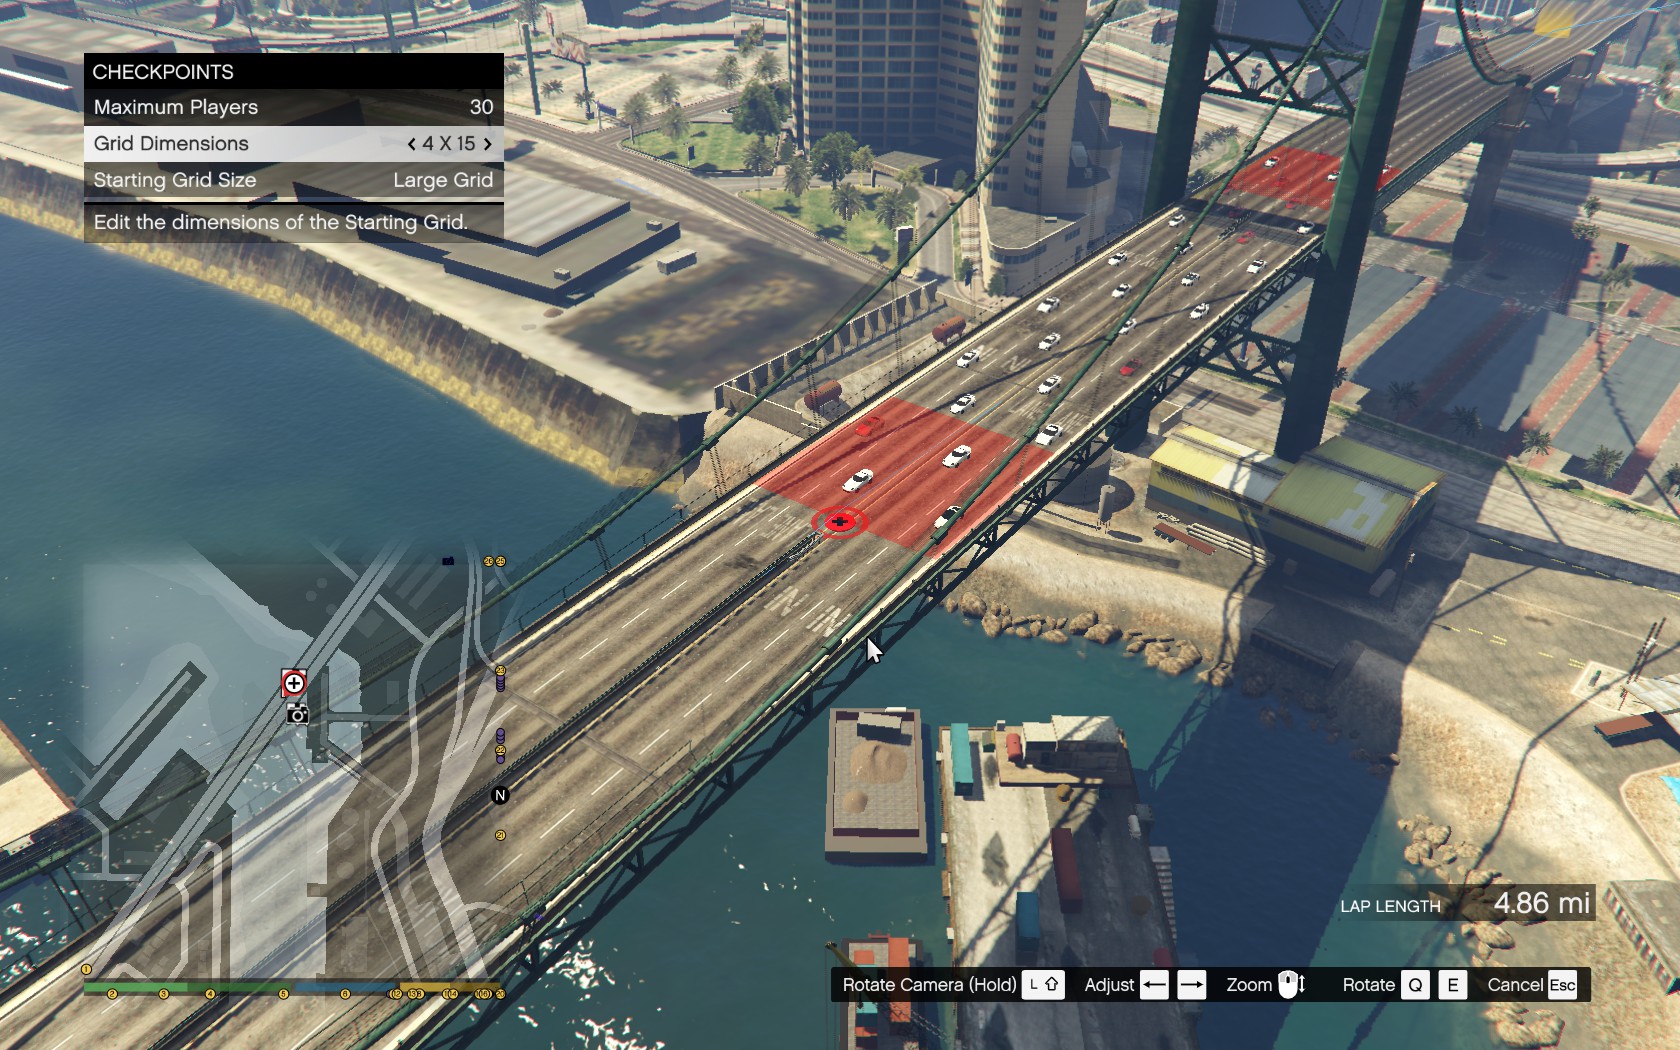
Step 4 - Change the grid size to something smaller, in most cases, small is the best since it can fit into much tighter spaces and is more tightly packed. Take note of what the grid dimensions change to when you change the size. Here they have changed to 11x6 as a small grid, compared to the 4x15 of a large grid.

Step 5 - Change the grid dimensions to be one larger than what they are. For example, if it is listed as 11x6, change it so it is instead 12x5. This step is important in getting the correct grid size for the final grid placement.
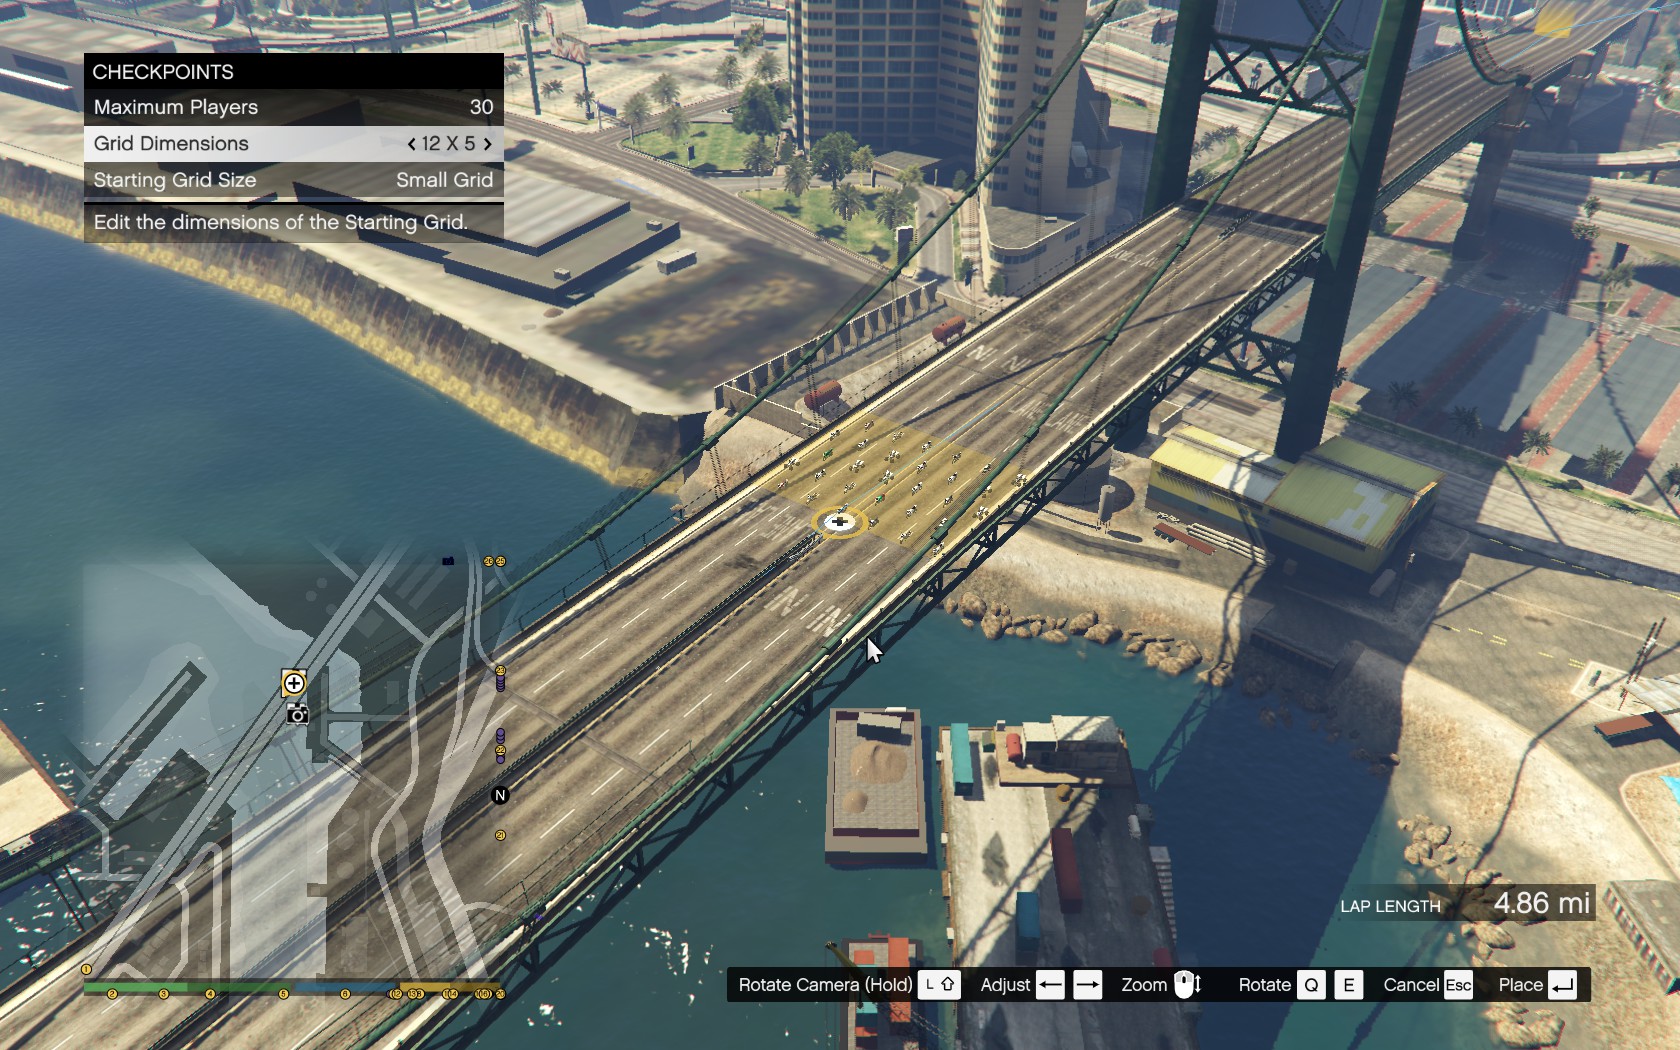
Step 6 - Now we do the grid placement glitch as described in EXAMPLE ONE above. Swap the grid size as you place it. Check Race Details > Available Vehicles to make sure the classes you want are available to confirm that you did the glitch right.
Step 7 - Final grid positioning! With the grid highlighted, pick it up as if you are going to move it, but don't! Don't change anything with it, just pick it up.
Step 8 - Cancel out of that. On Keyboard, press ESC. On Xbox, press B. Whatever the cancel button on PS is, press that. It will cancel out of moving the grid, but it will show the grid as being in your prefered placement and dimensions, glitched so that it fits despite the fact that it couldn't be placed there normally!
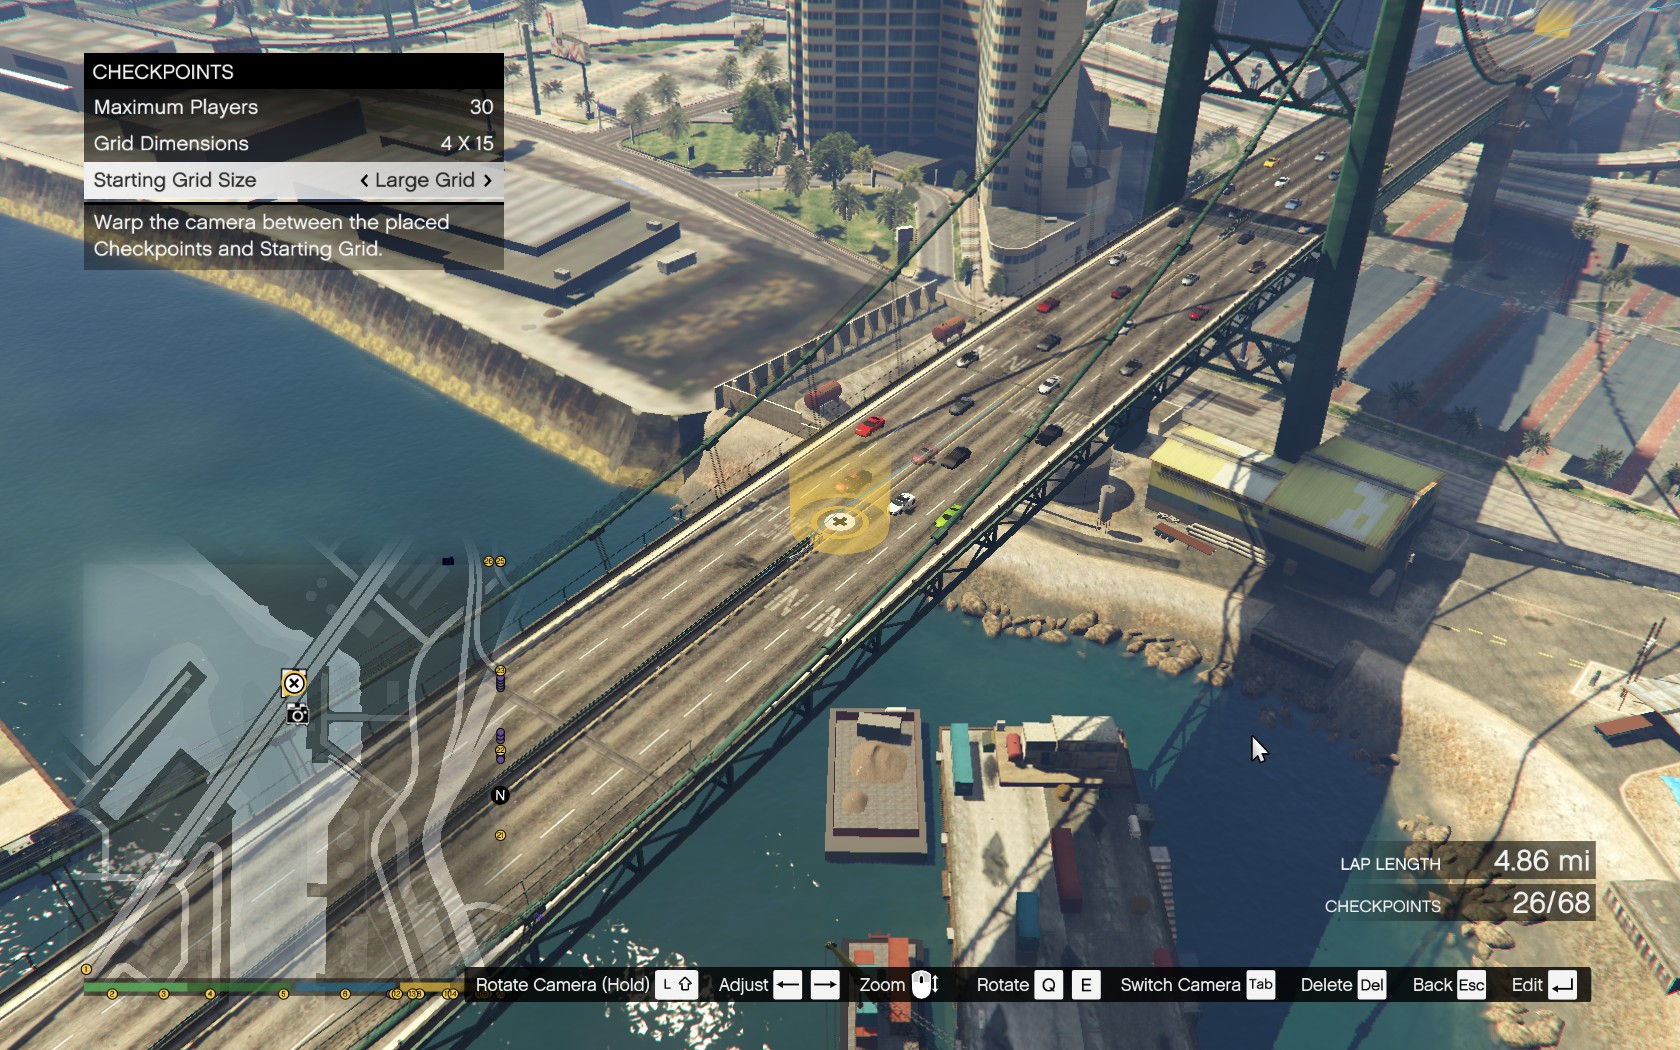
This allows you to have even more control over where your grid can be placed, such as splitting it down a long section of highway where it otherwise wouldn't go because of a center barrier, or over some annoyingly minor height changes in the terrain (especially useful for offroad tracks), and so on and so forth.
I'll add additional tricks to this as I take some more screen shots and do the write ups for them, so check back in the future for more!
Example One - Large grid in a Small Grid space
This is helpful for "fun" tracks especially, but can also be used to open up the class options for otherwise super tight tracks and allow a starting grid to be placed where it would otherwise not fit thanks to a random building or sign post blocking a spot or other inconvienently positioned things on the map.
Step 1 - Highlight grid size and choose "Small Grid".
Step 2 - Position the grid where you want it to be placed within the world.
Step 3 - As you press the button to place the grid, still with Grid Size highlighted, press LEFT to swap the grid size from Small to Large.
If you pressed LEFT at the same time as you placed the grid, it should show medium grid sized cars in a small grid formation. Go into Race Details and check Available Vehicles, looking to see if VANS are listed as available. If they are, congrats, you did the glitch correctly and now can use any of the classes in your race.
Example 2 - Fitting a grid on a road that is elevated oddly and won't let you place a grid normally
Step 1 - Line up your grid visually, making sure that the cars aren't going to be placed inside of a wall or something crazy like that. This may take some time, so a little patience here can pay off in a great grid position. Use the grid size that you want to end up to help line things up. Seen here, I am splitting my starting grid down the sides of the free way, making sure to keep the divider positioned equally between each side's cars so they don't spawn in the middle of a barrier.
Step 2 - Once you're lined up, DON'T MOVE THE CAMERA. You don't want to mess up your position.
Step 3 - Decide which grid dimensions you want for your finished grid - 2x30, 3x20, 4x15, 5x12. You are somewhat limited here, with the choices listed as the only options for the final grid. I've decided on 4x15.
Step 4 - Change the grid size to something smaller, in most cases, small is the best since it can fit into much tighter spaces and is more tightly packed. Take note of what the grid dimensions change to when you change the size. Here they have changed to 11x6 as a small grid, compared to the 4x15 of a large grid.
Step 5 - Change the grid dimensions to be one larger than what they are. For example, if it is listed as 11x6, change it so it is instead 12x5. This step is important in getting the correct grid size for the final grid placement.
Step 6 - Now we do the grid placement glitch as described in EXAMPLE ONE above. Swap the grid size as you place it. Check Race Details > Available Vehicles to make sure the classes you want are available to confirm that you did the glitch right.
Step 7 - Final grid positioning! With the grid highlighted, pick it up as if you are going to move it, but don't! Don't change anything with it, just pick it up.
Step 8 - Cancel out of that. On Keyboard, press ESC. On Xbox, press B. Whatever the cancel button on PS is, press that. It will cancel out of moving the grid, but it will show the grid as being in your prefered placement and dimensions, glitched so that it fits despite the fact that it couldn't be placed there normally!
This allows you to have even more control over where your grid can be placed, such as splitting it down a long section of highway where it otherwise wouldn't go because of a center barrier, or over some annoyingly minor height changes in the terrain (especially useful for offroad tracks), and so on and so forth.
I'll add additional tricks to this as I take some more screen shots and do the write ups for them, so check back in the future for more!